Mexican Food
October 7, 2016
Our Spanish tutor Marta arrived for our class today with some new fruits to try! Was great to be introduced to local fruits and how to eat/use them.
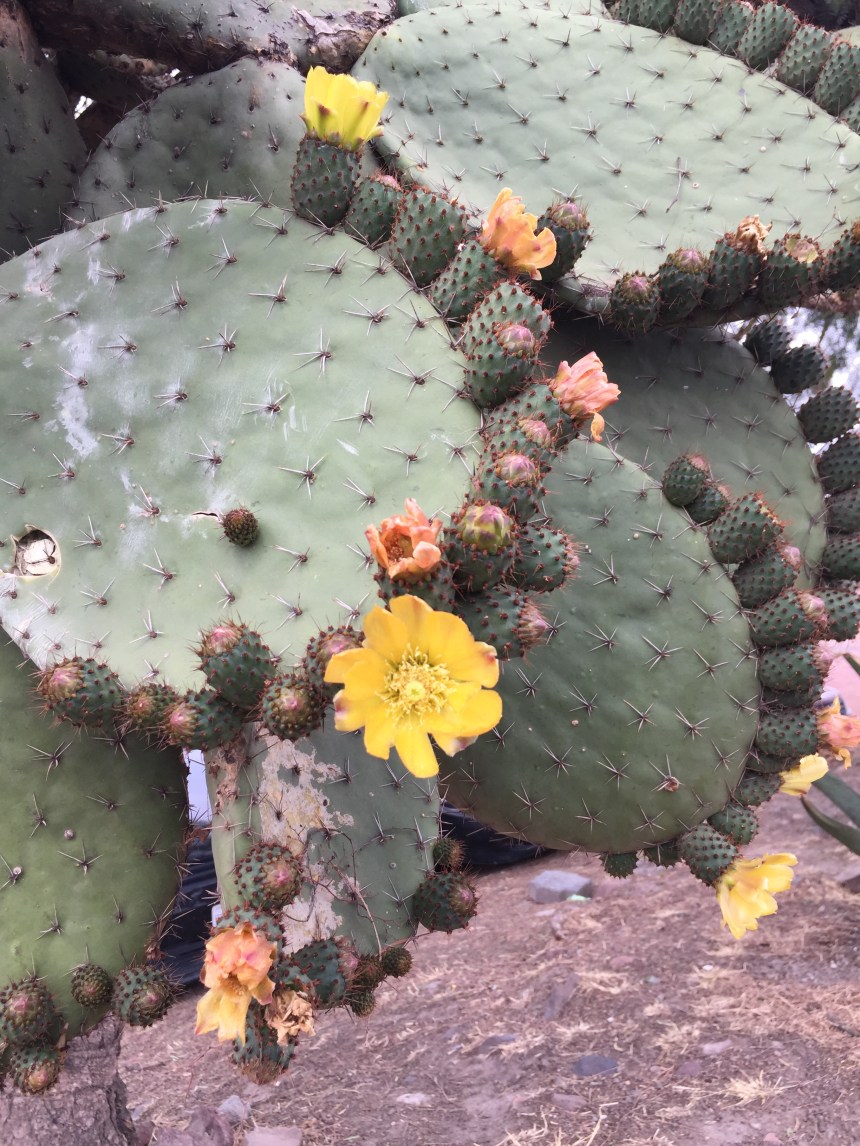
Cactus (above), commonly known as “Nopal”(noh-pal) is a staple here. It grows wild (the photo above is of a beautiful cactus growing wild at the site of the Teotihuacan Pyramids, in April, when it was just blooming. The fruit is now in season and has been harvested from Nopal fields for sale everywhere) and is also cultivated on Nopal farms. Mexicans eat the “leaves” as well as the fruit the plant produces, call “Tuna” (makes it somewhat tricky to get our heads around and remember as the fish “Tuna” that we know is actually called “Atun” in Spanish. A little strange to think of “Tuna” as a fruit!!) Anyhow, was grateful that Marta thought we should know about this fruit as it is so plentiful and inexpensive. She showed us how to peel it – the skin is very thick and peels off very easily, revealing a seedy pale green fruit – sort of a cross between kiwi and pineapple in taste and texture. When peeling, Marta recommended holding the fruit with a cloth so as not to get poked by the sometimes sharp remnants of spikes that are cut off when harvested. We tried it sliced and found it pleasantly sweet but very seedy. So we peeled a bunch and popped them in the blender to make “water” – flavoured-with-fruit “waters” are very popular here. Basically blended the fruit with a bit of sugar (really don’t need much as the fruit is already quite sweet) and some water. We strained it into glasses with ice – was super refreshing!

This is the mature fruit, which is also available in red. Marta says the red ones are not as nice. We also tried Guava (pronounced “gwai-a-bah” – I was corrected many times for my English pronunciation of this word! lol!) They are about as big as a small lemon and taste slightly tart and sweet – Marta says it is very typical to blend Guava with milk and sugar for a breakfast drink.

September 27, 2016
Mansell doesn’t really like Mexican food. Kudos to this kid for giving it all a brave try. He finally just said it out loud last week when I served the third Mexican recipe in a row. Poor kid – I’d noticed that he’d been picking at his food, and when asked if he liked it, he would just say, “It’s ok, I’m just not that hungry tonight…” But by the third night he had had enough. “Mom, I don’t want to hurt your feelings, but I don’t really like this kind of food…I like pastor tacos and quesadillas with JUST cheese, but it really isn’t something I enjoy…” I started to laugh (It is more than possible that I might be horrible at cooking Mexican food!!) and then tried to name at least one thing I thought he liked, “What about the Tortilla soup?” “I just said I liked it because it was the only thing we made with Paulina that day that I could sort of stand – I didn’t want to hurt her feelings..” LOL! Even the Chef’s food was hard for him to stomach! I’ve been working really hard to learn how to cook some Mexican dishes because it is less expensive and you are guaranteed to find the ingredients you need at the market. International foods can be pricey and limited in availability. Mansell has had a few “moments” with the food here and I can’t really blame him. He ordered fish at a restaurant in Valle de Bravo and he found himself eye to eye with the whole fish slapped across his plate staring up at him… very different textures and flavours and scents… takes a bit of getting used to… and I’m trying to adjust some of the recipes to appeal to our palettes, but ultimately I really appreciate that he finally told me I’m just not doing enough for his… so he doesn’t have to keep defaulting to a bowl of cereal for supper!!!
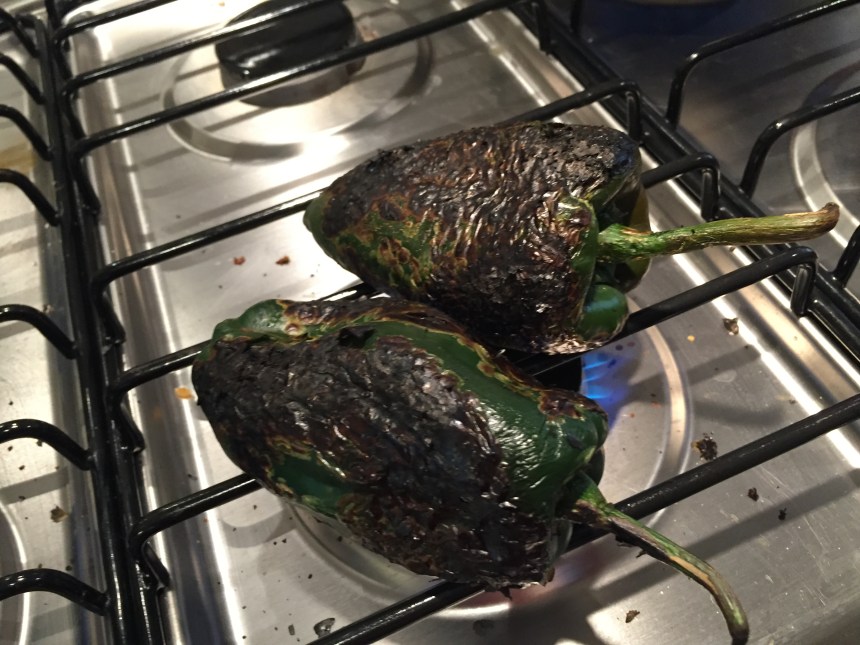
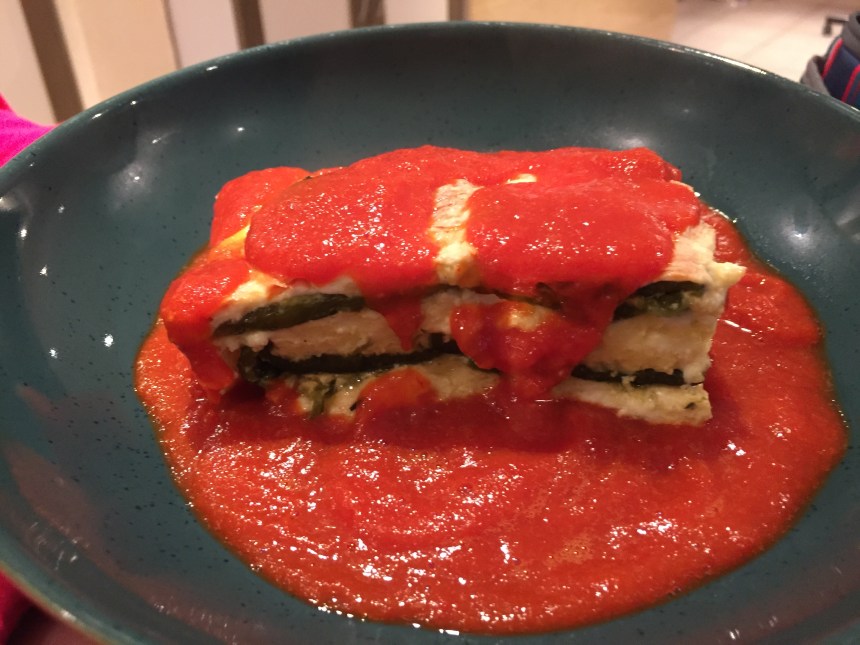
It’s funny too how different each kid is – I made this dish that I understand is like Mexican “comfort food” called Chiles Rellano (Chiles ‘stuffed’). I kind of cheated and put all the ingredients into a casserole format, feeling a little daunted by the task of stuffing each chile with cheese… Glad too, as even the casserole took me 3 hours to prepare – it’s a time intensive dish as you have to char the skins of the poblano peppers directly on your stovetop then let rest and peel and seed before you can even begin to assemble the layers for the casserole.
Caleigh and Hudson loved it – Caleigh so much so that she asked for it for her Birthday supper!! That is the biggest honour a food can have at our house. And there was Mansell, picking away at it, cutting it up, mashing it, moving it around his plate… 🙂
So I’m going to dig out my “Canada” recipes and plan to make more of those…maybe have been a bit too overzealous about embracing the culinary aspects of this new culture…
Learning About Mexico Through Local Foods
June 2016
We just finished a five week cooking course with Chef Paulina. I first met Chef Paulina Lara who was promoting her cooking class series at the Newcomer’s meeting and I was instantly interested – she promised to take us on an historical journey of Mexico through learning about food ingredients and methods for making dishes from various regions in the country. I signed up and within a couple of weeks, we were cooking Mexican cuisine and enjoying a mini-historical journey of Mexico through the foods of four different regions. I have been very interested to learn to cook some typical Mexican dishes so that we can eat the local foods more easily and shop inexpensively and I was thrilled when Paulina agreed to teach the five of us. The kids love to cook and have decent chopping skills and a basic knowledge of how things work in the kitchen. For my “Canadian and beyond” readers I will share just a few recipes here in this post and if you wish to learn more, let me know. If you’re local to MX City, I highly recommend taking her classes! (Chef Paulina Lara Tel: 55850050/ cell: 0445530230920)
A few highlights of our learning:

Salsa Martajada (basic red salsa)
Ingredients:
4 red plum tomatoes; 1 chile (jalapeno or cerrano – we used cerrano and it has a really crisp, fresh heat – a little more spicy than jalapeno);1/4 white sweet/Spanish onion;salt and/or cilantro to taste
We roasted all of the ingredients whole in a pan then chopped them coursely and put them into a MOLCAJETE (Mole-cah-heh-tay) like a very large mortar and pestle made of volcanic rock. Before metal, the ancient Mayan civilizations had a lot of volcanic rock to work with, so this was how they muddled, mashed, smashed their food to make sauces (salsas). Each of the kids took a turn smashing the ingredients together – in the end, we used the blender to help us finish chopping up the tougher roasted onion skins. What an AMAZING flavour roasting the ingredients produced… very smokey and “muy rico” (very rich, very delicious). The freshness of this salsa was so apparent and we realized that salsa making is so very simple and easy and can be done on the day, in the moment, to accompany any dish or to dip tortilla chips; I’ve been so used to salsa making being an all day thing to preserve the garden yield for winter! 🙂 Using fresh chilies makes all the difference too! Having a good blender is a plus. We thought we could probably add roasted corn and black beans to make it very substantial.
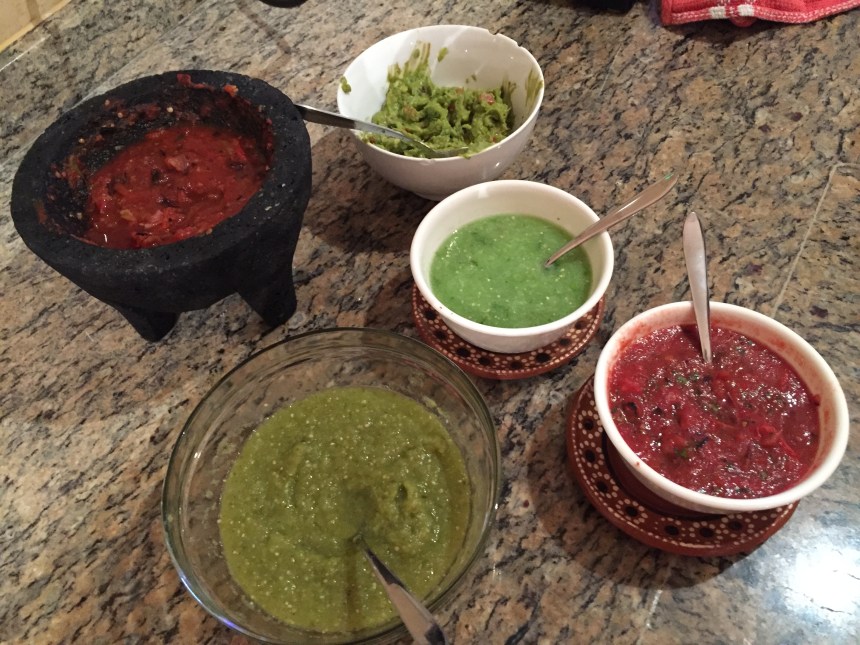
Salsa Verde (green)/Rojo (red)
Ingredients:
6 green tomatoes (they are typically smaller than red)/ 4 red plum tomatoes; 1 chile (jalapeno or cerrano);1/4 onion; salt; cilantro
All ingredients are thrown into the blender and whirled around til quite smooth – these are NOT chunky salsas. You can serve this immediately, “raw” – it’s very fresh and yummy! Or, you can heat it through – this “cooked” salsa (verde o rojo) is typically used for Chilaquiles (chee-lah-qee-lays) which is layered fried tortilla chips, hot salsa (verde o rojo), cream (crema) and topped off with shredded cheese – a typical Mexican breakfast.
A tip Chef Paulina shared with us was to add a spoonful of sugar if the tomatoes seem too acidic – at certain times of the year, she says, they are no longer sweet tasting, but get a bit acidic. The other cool tip she shared (which I certainly could have used a couple summers ago when I learned my lesson the hard, burning way chopping jalapenos with bare hands for the preserved salsa I was preparing…) – if your skin comes into contact with the hot chiles, you can use the tomato juice with tomato seeds to help cool your burning skin.
Quesadillas
Now, when we foreigners think of Quesadilla’s, we typically think of two very large, usually wheat tortillas sandwiching all manner of fillings and glued together when fried with cheese. This is a very Tex Mex interpretation. The Mexican Quesadillas we learned to make were made with very small, corn tortillas. We made them in one of three ways – fried tortilla with filling, folded over; uncooked tortilla filled with filling of choice and folded over into a half-moon, edges pressed together, and then fried in veggie oil; and finally, “Sope” (soh-peh) – tortilla cooked, then edges folded up around the perimeter while it’s still hot and toppings placed on top, open-face style.
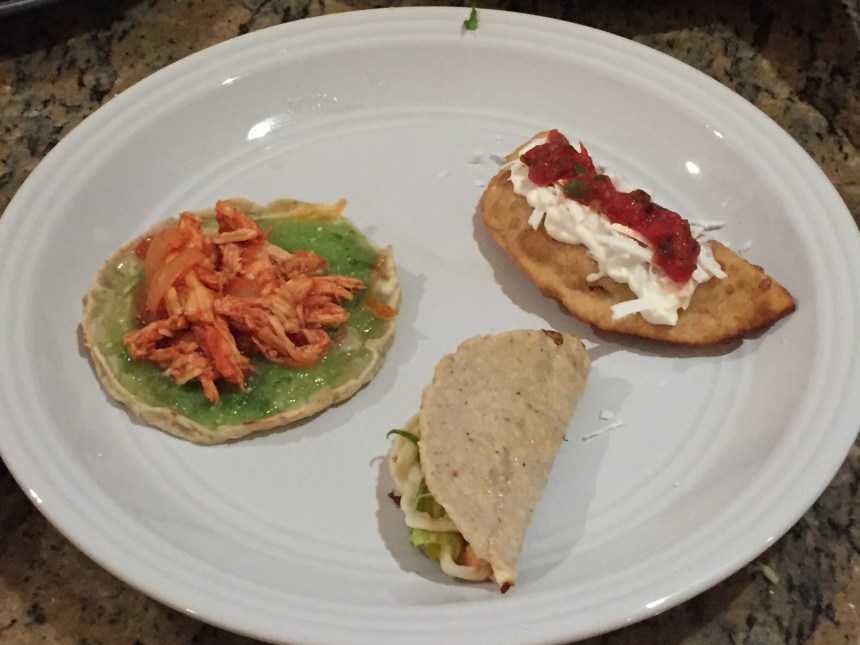
Along with Tinga as a possible filling on this day, we could also fill our tortillas with Huitlacoche (Wheet-lah-coh-chay), Oaxaca (wah-hah-cah) cheese (yummy, local type – very much like string-cheese, only milkier – kids LOVE it!!), and Flor de calabaza (Zucchini flower).
Huitlacoche was a very new ingredient for us…
It is a corn fungus/mold… I know, took me a bit to get my head around it… the actual kernels of corn get a disease and that’s what makes it puff up and turn kind of spongy – like a mushroom! Over the years, it was determined that this was indeed a very edible form of corn, albeit an aquired taste andtexture? We learned that there are over 200 varieties of corn used in Mexico – it really is the number one staple of the Mexican diet). It looks like very large, grey/blue kernels of corn, and is soft, like a mushroom. It very much has the texture of mushroom but you can still taste corn. We chopped it into smaller pieces and Hudson sauteed it with fresh epasote (a uniquely Mexican herb), chopped onion, chopped garlic and salt. We then used this in combination with Tinga, cheese and zucchini flower as filling for our quesadillas.
Guacamole
Ingredients:
chopped red tomato (1 tomato per 1 avocado); finely chopped onion (to taste); chile (to taste) – jalapeno or cerrano (we used cerrano which had a good fresh kick of spice); avocado
although we didn’t, some recipes I’ve looked at suggest using fresh lime juice and garlic and cilantro as well. All would be yummy!
We muddled the guacamole ingredients in the molcajete, and were careful not to make it too smooth – you want some chunks of avocado. We dipped tortilla chips, chapulinis (crickets) in the guacamole – first time eating crickets! They are roasted and salted, so once you get past the buggy, leggy look of them (I had to close my eyes to pop one in my mouth) they are sort of salty and crunchy, like nuts… sort of… hard to describe the sensation exactly. We all tried at least one. Good for us!!


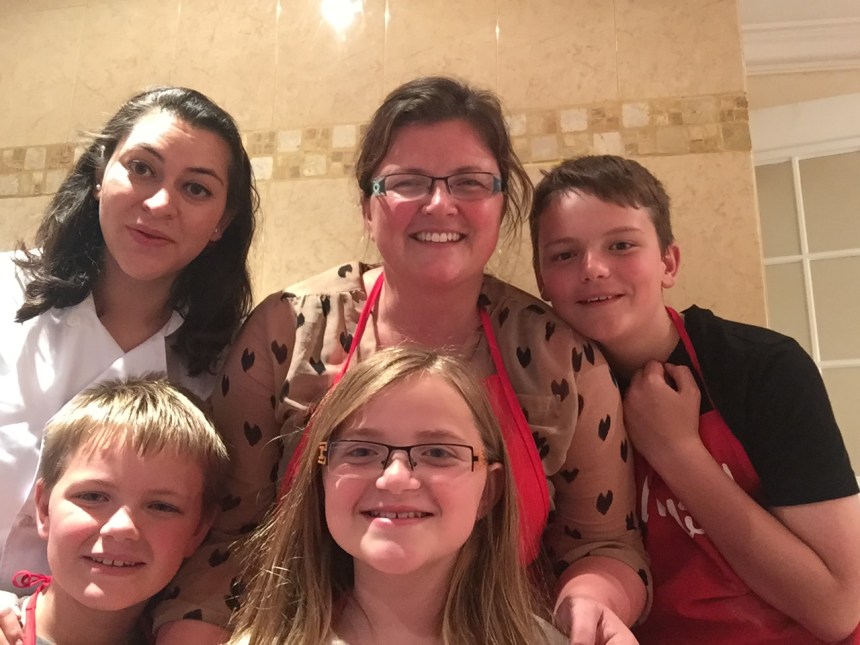
Was so much fun to learn to cook some traditional Mexican cuisine – it’s been a goal of mine since arriving here. Chef Paulina gave us the option of purchasing an apron (that we discovered she and her mother make for her clients) to wear for our classes and then to have as a souvenir. She was very thoughtful and suggested that we choose red aprons with our names on them in white writing, like our Canadian flag… when she arrived on the first class with our red and white aprons, she had also added a white maple leaf on the pocket of each apron – was just so thoughtful!! And Chef Paulina was just so great to work with and was a joy to spend three hours with!
Baja California/Gulf of Mexico regions
Today we learned to cook some really refreshing and fresh dishes that are common in these typically tropical and hot climes. Mansell was particularly shocked that you can “cook” using “acid”… he really was finding getting his head around the chemistry of this method of “cooking” seafood challenging. Was neat to see it happen though – the kids got to try Chef Paulina’s super cool lime juicer – allowed us to juice at least 20 limes quickly, and “cooking” with lime (limon) requires a lot of juice to ensure the fish is completely covered…(the lime juicer is a very common kitchen tool here). We learned about the difference between limon (lee-mone) and lima (lee-mah) – to us, “limon” sounds a lot like “lemon” and the terms are often mistakenly interchanged, but meaning is very different. Here, “limon” is lime, the small green limes that are plentiful and used in many, many Mexican recipes. Paulina explained that is because the large yellow “lima” (what we know of as “lemon”) are called that because they originate from Lima and are imported today and as such are much more expensive. They are not native to Mexico so there are very few traditional recipes that call for yellow lemons. Anyhow, it was really neat to see the citric acid of the lime change the properties of the meat – we used white fish (Tilapia) and shrimp – it changes from looking kind of transparent and raw to opaque white and “cooked”, in only about a 1/2 hour! The texture of the fish is soft and the flavours of the dishes are just so light and fresh.
Ceviche (say-vee-chay)


Ingredients:
4 pieces fish – Tilapia or Esmetregal (Mexican) or Tuna are good options – cut fish into small cubes; onion – white or purple (Cebolla morada) – as much or less onion as fish, but never more onion than fish – cut into small cubes, same size as fish; 3 plum tomatoes – don’t want too many seeds/juice ; 6+ limes – enough juice to completely cover the fish: finely chopped cilantro; Salt and olive oil; 1 cerrano chile, chopped finely; Avocado and cucumber (peel and remove seeds) and cut same size as fish
Method:
- Combine lime juice, fish and onion and let sit (“cook”) for at least 1/2 hour – you can tell when the fish is “cooked” – it will be more opaque and white, instead of transparent/raw looking
- In the meantime, chop tomato – just cut four sides off, leaving a square “core” of seeds and juice (can save this to make a salsa later!); remove any seeds/juice from tomato sides and chop into cubes the same size as fish/onion.
- Peel and seed cucumber and chop into same sized cubes
- Chop cilantro and Cerrano chile into fine bits
- Peel and chop avocado into same sized cubes
- Add to Fish/onion/lime mixture and stir to combine.
- Finish with salt and olive oil (Big Fat Finishing Oil, to borrow from my chef-hero Anne Burrell)
- Serve on crackers or tostado
SO YUMMY and FRESH!!!
VARIATION: Paulina told us about what sounds like a really tasty variation on traditional Ceviche. Omit Tomato and Cucumber and instead add small-cubed mango and a can of sweet corn; can also “cook” in orange citrus instead of lime. All other ingredients remain the same.
Baja Taco
Ingredients:
Raw Shrimp (20-30) – boiled in salted water; peel skins; 1/4 small Onion; 1 clove Garlic; handful Cilantro; Salt; a bunch of Cheese (grated/shredded); Chipotle Mayo; 1 can beans (refried); Flour Tortilla (10 small)
This recipe was neat and simple and so tasty. We learned that there are different tortilla’s used in different regions. To the North and along the Baja California coast, wheat tortilla’s are most popular, due to historical influences from the United States. The interior and to the South of Mexico, mainly corn tortilla’s are used – and even those differ according to the type of corn used. We are more used to the wheat ones, but the corn ones are slowly growing on us… so far the one’s we like the best, that have the most flavour, are the blue corn tortillas. We also learned that anything served in a tortilla is technically a TACO – however, the possible fillings are many – most of the traditional foods are prepared so that they can be scooped up and consumed using a tortilla. No cutlery required!
Method:
- Prepare Shrimp and then transfer to large fry pan and sautee with onion and garlic
- In another small pan/pot, warm through the beans
- Prepare Chipotle Mayo – this is just awesome and can see using it for so many other things!To a few tbsps mayo add the adobo liquid from that can of chipotle – can chop up the actual peppers and add them too for extra kick
- To assemble Tacos – remove shrimp from pan and warm up tortilla’s in the same pan; smear a bit of bean on first, then layer mayo, shrimp, chopped cilantro and cheese – SO Yummy!

I baked Aaron a cake for after one of our cooking lessons, which happened to fall on his Birthday!! HAPPY BIRTHDAY TO YOU!!
Pastor


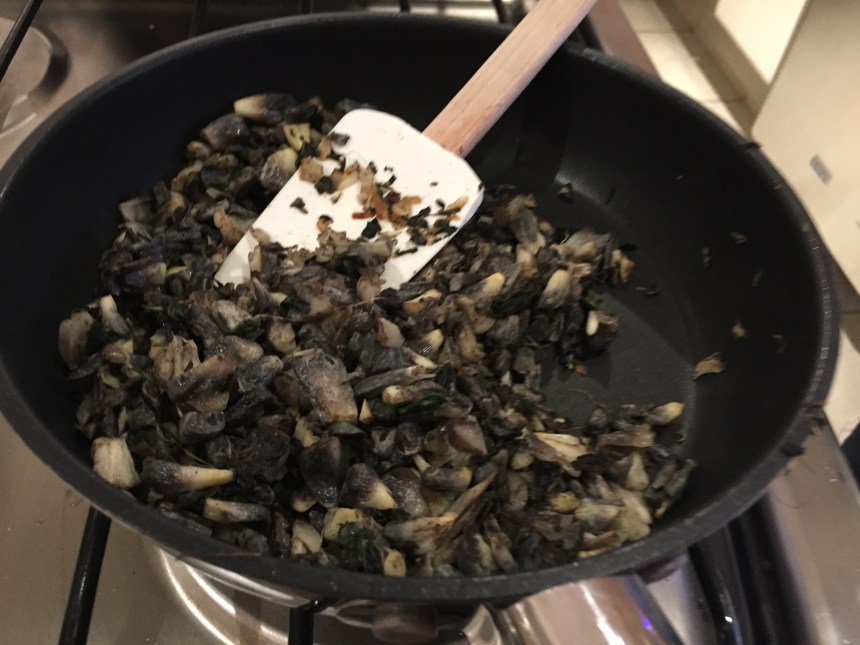
We made a Fish Pastor, but you can use the “Pastor” seasoning for all meats – it is commonly used to marinate pork, which is then layered onto a giant skewer and slow cooked, then shaved off for tacos – a bit like gyro meat. The meat is then piled into tortilla’s and topped with cilantro, pineapple and onion. I’m not normally an onion fan, but soaking the onion in lime really reduces the pungency and I can stand a little of it! We had the pork Pastor at a party and it was really tasty, so we were excited to be learning about how to prepare it. I learned about the plentiful dried peppers I’ve noticed in the grocery stores, and that they are used for many salsas (sauces) here in Mexico. Paulina cut off the tops and scooped out the seeds, which fell out easily, then dropped into boiling water to soften to prepare for making the Pastor salsa.
Cochinita Pibill (Coh-chee-nee-tah , Pee-beel) (Pit Pork)


This is a traditional mayan recipe from the Yucatan region (Mayan Riviera) of pork that typically is marinated for 24 hours in a pit in the ground. There are easier ways to prepare today, but some regions still prepare in the traditional way, although now they can put the pork in a pot – before pots, mayans wrapped it in banana leaves… check out this video to see how they layer everything into the pit (traditional cochinita pibill preparation). Once upon a time Mayans used the spice achiote (ash-ee-oh-tay) in this marinade as currency – it was so valuable to them because it could be used for so many different purposes (dye, paint, to flavour foods, etc.) It is a bright orange/red colour and can be found in the grocery store today. We learned to make Jamaica juice and used it in “the world’s largest margarita (sans Tequila)” 🙂
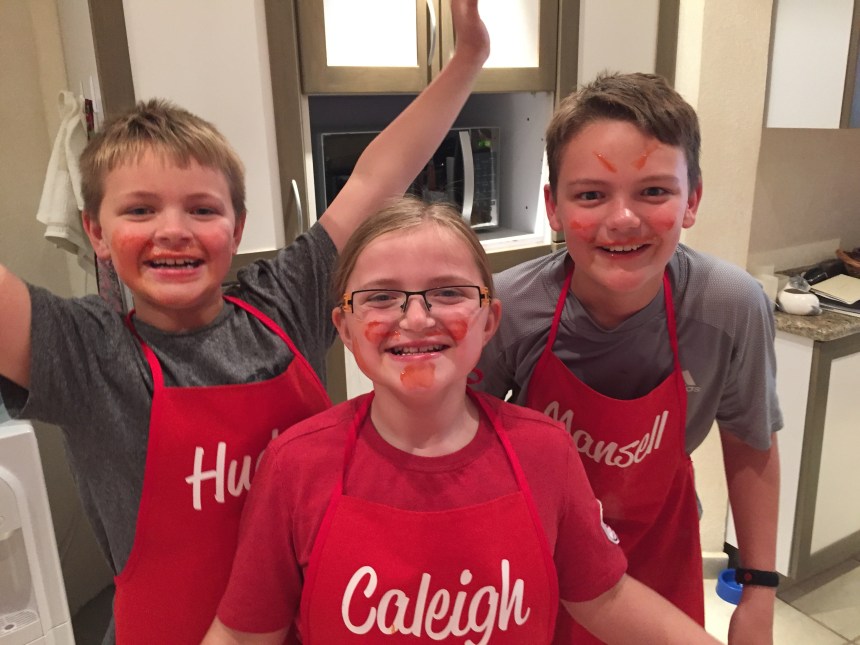
Kids tried Habanero Chile during this class… let’s just say they really threw themselves into it and their mouths and faces were on fire. We learned a trick for too much spice – put some ketchup on it! So a little ketchup painting ensued…


Hudson learned a lot during this class. He sort of powerhoused his way through an avocado, modeled as Caleigh’s eyes. Paulina’s eyes were that big when she realized that he cut straight through the pit when given the task of chopping the avocado. “No one has ever done that before – the pit is usually too hard…”


See? I really was there too – here we are shredding chicken (we boiled all of the meat to prepare it) for the Tortilla soup Mansell is about to dig into! The black ingredient in the white bowl is a type of dried chile that we fried in a little veggie oil to make a spicy, crunchy garnish for the soup. The soup was a big hit with the kids.


We learned to make “Molliete” which is a typical beans on bread with cheese dish. Was terrific with homemade Pico de Gallo on top!


Even learned to make some sweet dishes – the corn bread was amazing with dulce de leche. And Mansell wears his heart (a deep fried Mexican sweet treat called Bunuelos) on his apron! 🙂
Such a neat experience to learn about how to use local ingredients to create some traditional dishes. Thank you Chef Paulina!
